

What is daylight control?
Many buildings already receive plenty of daylight during the day. Yet in practice, the lighting often just burns on at full strength. This often happens especially at workplaces along the façade, in classrooms with large windows or in care environments with a lot of glass. This is not always necessary.
With daylight control, you match the amount of artificial light to the available daylight in the room. A sensor measures how much light is present, after which the system automatically dims or switches the fixtures. This keeps the light level in better balance with the situation in the room.
For installers and lighting designers, daylight control is particularly interesting when lighting comfort, standardization and smart design come together. It helps to avoid unnecessary energy consumption, but just as important is that the light level in the room better matches usage. In this article you will read what exactly daylight control is and how it works with sensors.
What is daylight control?
Daylight control is a form of lighting control in which artificial light is automatically adjusted to the amount of daylight in a room. If there is a lot of daylight, the lighting is dimmed or partially switched off. If daylight decreases, the system ensures that the luminaires provide more light again.
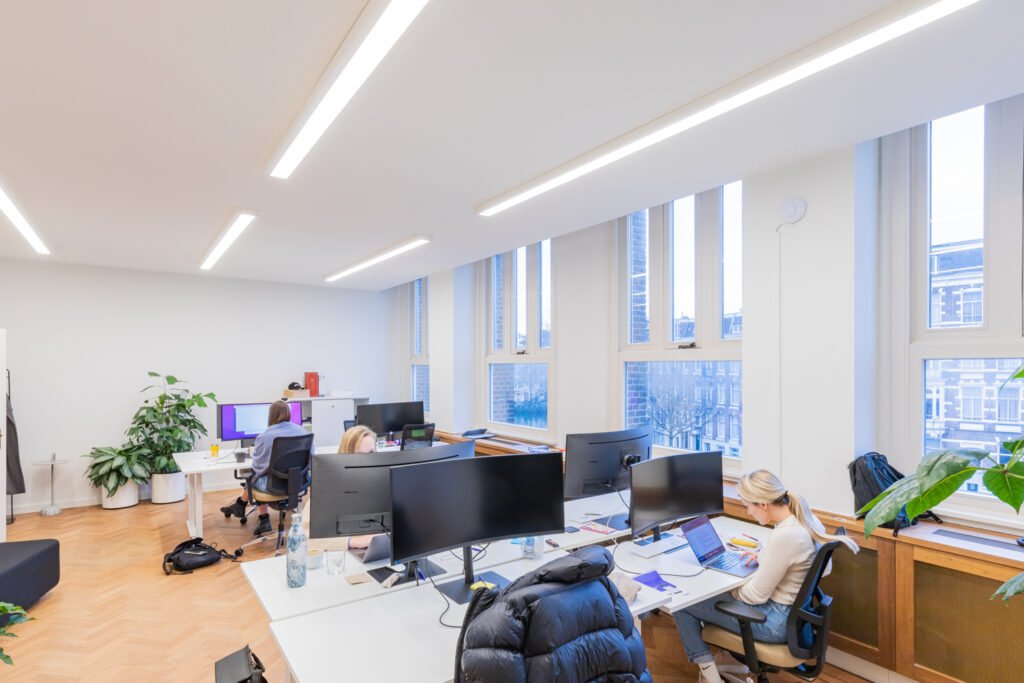
The purpose of daylight control is not only to save energy. At least as important is maintaining a usable and as constant a level of light as possible in the place where work, learning or care is done. In an office, for example, that means keeping a window workstation from being unnecessarily over-lit when the sun is already doing much of the work.
Daylight control is seen primarily in buildings where the amount of natural light changes markedly throughout the day. Think of offices, schools and healthcare environments. Especially there, the difference between the façade area and the center of the room can be large. Without control, lighting then often burns harder than it should.
In a good design, therefore, daylight control is not separated from the rest of the lighting plan. The position of windows, the layout of the room, the control zones and the desired light level on the work surface all play a role. Issues such as Lux, UGR and the requirements from a lighting plan are also directly related.
How does daylight control with sensors work?
Daylight control works on the basis of measurement and control. A sensor measures how much light is present in or near a room. Based on this measurement, the control system determines whether the connected luminaires should provide more or less light. This is usually done steplessly by dimming, but in simpler applications can also be switched.
In practice, such a control works well only if the measurement is correct and the system is set properly. Not only is the sensor itself important, but also the location where it hangs, the size of the control zone and the set target value. Especially in rooms with large areas of glass or varying occupancy, this makes a lot of difference.
In modern systems, daylight control is often combined with other forms of control. Think of presence detection or a control system via DALI or Casambi. The presence sensor then determines whether lighting is needed at all, while daylight control determines how much artificial light is still needed at that time.
The role of the lux sensor
The lux sensor is the component that measures the light present. That measurement forms the basis of the control. So the sensor does not look at how much power a fixture is using, but at the amount of light it detects. It then transmits that information to the control system, which controls the fixtures.
Thereby, the position of the sensor is very important. If a sensor is positioned unfavorably, it does not measure the correct situation. For example, it can be influenced too much by direct sunlight or by artificial light from the luminaires themselves. In both cases, the control responds less accurately than intended.
The layout of the space also plays a role. More daylight is often available at workplaces along the façade than further in. Therefore, it makes sense not to control the entire space as one zone. By controlling façade zones separately, the control is more in line with practical situations and you avoid dimming lighting in the entire office while only the part near the window receives enough daylight.
What is a set point in lux?
The setpoint in lux is the target value that the system controls toward. Simply put, this is the desired light level that should be maintained at a given location. If the measured light level falls below that point, the system sends the fixtures up. If more daylight comes in, the system can actually dim back.
That set point is usually chosen based on the function of the room and the desired light level at the work surface. In an office, for example, you want to keep enough light at desk level without making it unnecessarily bright. The setpoint helps establish that balance in the control.
In practice, it is important to realize that the sensor value is not always the same as the lux value on the work surface. A sensor often hangs from or in the ceiling and thus measures from a different position. Therefore, a control must be properly adjusted. Only when sensor, room and target value are properly matched will daylight control work as intended.
Open loop and closed loop explained
In daylight control, it is not only the sensor that is important, but also how that sensor measures. Here, a distinction is often made between open loop and closed loop. For installers and lighting designers, this difference is relevant because it says a lot about the location of the sensor, the accuracy of the control and the way you control a room.
The choice between open loop and closed loop depends on what exactly you want to measure. If you primarily want to respond to incident daylight, a different setup will work than if you really want to control the total light level in the room. Therefore, it is a good idea to take this distinction into account at the design stage.
Open loop
In open loop, the sensor only measures available daylight. The artificial light from the fixtures is not included in the measurement. The sensor therefore looks, as it were, at what light is coming in from outside, after which the system determines how much artificial light should be added.
This approach is especially useful when the sensor is aimed at incident daylight, or hung in a location where it is not affected by light from fixtures. For example, consider a sensor near a facade area or close to a window strip. In such a situation, you can properly anticipate changes in daylight without the control affecting itself.
A major advantage of open loop is that the system can respond fairly immediately to changing outdoor conditions. At the same time, this method does require thoughtful positioning of the sensor. If the sensor does not measure the correct daylight situation, the control does not match the actual light level in the room as well.
Closed loop
With closed loop, the sensor actually measures the total light level in the room. This means that both daylight and artificial light are included in the measurement. Based on that value, the system tries to maintain a preset target value in lux via a feedback loop.
That makes closed loop interesting in rooms where you really want to control the light level on or around the work surface. This is because the system not only looks at what is coming in from outside, but at the overall result in the room. As a result, the control often better matches the actual usage situation.
Especially in offices, schools and other functional areas, this is a great advantage. When daylight changes, the luminaires dim along with it until the desired light level is correct again. This creates a more stable light image, provided the sensor is properly positioned and the setpoint is set correctly.

When do you apply daylighting control?
Daylight control is particularly interesting in spaces where the amount of natural light varies markedly throughout the day. The greater the difference between areas close to the façade and deeper in the room, the more logical it becomes to adjust artificial light accordingly. In practice, you see this primarily in offices, schools and healthcare environments.
Offices
In offices, daylight control is particularly interesting for workplaces along the façade or in open-plan offices with large areas of glass. There, the control prevents luminaires from unnecessarily remaining on at full brightness when there is already sufficient daylight.
Schools
In schools, daylight control works well in classrooms with large windows, where the light situation changes significantly throughout the day. This keeps light levels better balanced without making a room feel very different in the morning than in the afternoon.
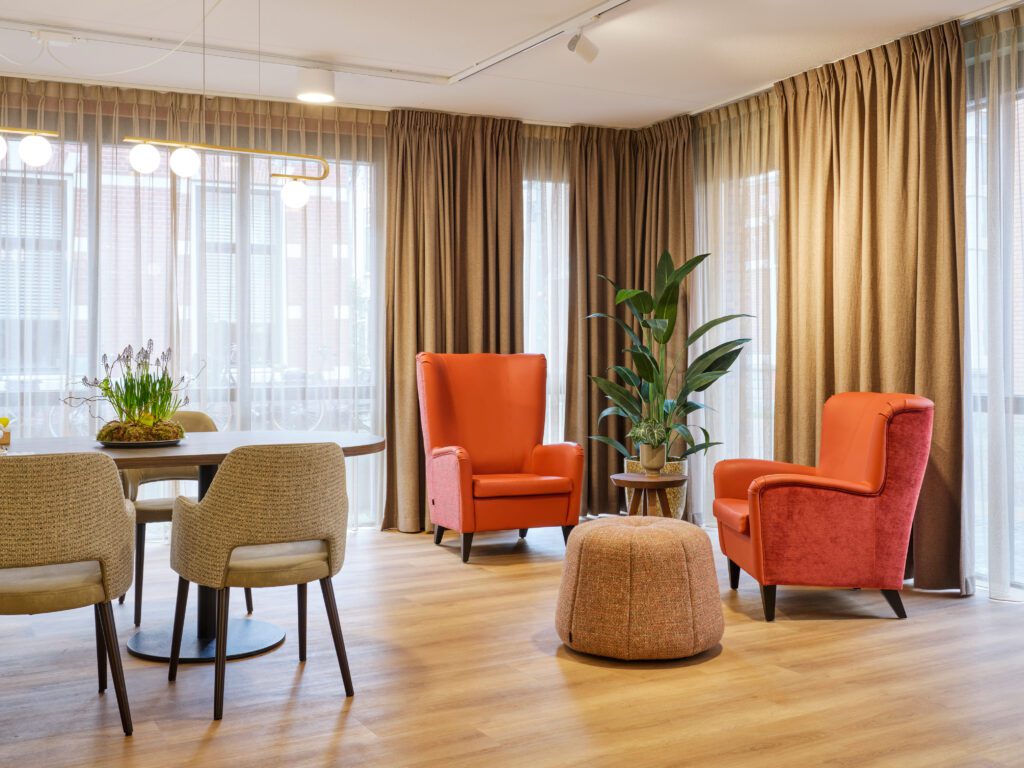
Care
In healthcare environments, daylight control can make sense in areas with a lot of daylight, such as waiting rooms, treatment rooms or general living areas. There, the control helps match light to the room more calmly, without remaining unnecessarily bright when there is already enough daylight.
Combining daylight control with presence detection
In many projects, daylight control works best when combined with presence detection. In fact, the two do something different. Presence detection determines whether lighting needs to be switched on. Daylight control then determines how much artificial light is still needed in the room. This prevents lighting being switched on in an empty room, but also prevents fixtures from continuing to operate at full levels while sufficient daylight is already entering. That makes the combination of a motion detector with daylight control especially logical in offices, schools and healthcare environments.
For installers and lighting designers, this distinction is important in design. A presence or motion sensor looks at room usage. A daylight sensor looks at light levels. Only when the two work well together do you get a control that responds logically to real-world conditions. If someone enters a room with enough daylight, then the system needs to add little or sometimes no artificial light. If there is too little daylight, however, the same system can automatically regulate to the desired level. Both DALI and Casambi support that combination of presence and daylight as part of a single control system.
In design, that usually means thinking not only about luminaires and light distribution, but also about detection areas, control zones and sensor positions. A room can be technically well equipped with daylight control, but still feel restless if presence and daylight are not well matched. This is precisely why this combination should be included in the lighting plan early on.
Daylight control with DALI or Casambi
Daylight control can be controlled in various ways. In practice, you often end up with DALI or Casambi. The basic logic is the same for both: sensors measure what is happening in the room, after which the lighting responds. The difference is mainly in the way of organizing, setting and expanding. Therefore, in this article it is more convenient not to look at which system is “better,” but at what type of project and control you want to build.
DALI
DALI is interesting when you want to organize zones, sensors and dimming digitally and be able to adjust them flexibly later. The system is designed for lighting control with addresses, groups and control scenarios, allowing you to determine per zone how luminaires react to presence, daylight and dimming commands. Especially in projects with multiple rooms or different daylight zones, this gives a lot of grip in design and implementation. The DALI Alliance explicitly mentions daylight harvesting, occupancy sensing and dimming as components of the system.
For lighting designers, DALI is especially nice when you want to work in a building in a structured way with control zones and functional differences within one project. For installers, the advantage lies mainly in the clear digital set-up and the possibility of making adjustments later without having to re-approach the entire system from a fixed on-off logic. This is especially practical in offices, schools and healthcare projects, as use and layout can change over time.
Casambi
Casambi supports basically the same logic, but wirelessly and software configurable. This makes the system interesting in projects where flexibility in configuration is important, or where you prefer not to be completely dependent on a traditionally wired control structure. Casambi supports basic, open-loop and closed-loop daylight control and additionally allows settings such as sensitivity, tolerance and lux thresholds.
In practical terms, this means that you can fine-tune how quickly and how strongly a control responds per room or zone in a fairly targeted way. This is especially relevant in rooms where daylight changes quickly, or where you want to prevent fixtures from dimming up and down too restlessly. For designers, it offers control over the perception of the space. For installers, it makes it easier to adjust the control after completion if practice turns out slightly different than previously thought.

Where do things often go wrong in design?
Daylight control only works well if the technology is right and if the control is worked out logically in the design. In practice, things often go wrong not with the idea of daylight control itself, but with the translation to sensor position, control zones and control behavior. As soon as those three don’t mesh well together, a control system quickly emerges that feels restless or doesn’t do what you expect of it. Users are then more likely to override manually, whereas the system is meant to be controlled automatically and almost imperceptibly. Systems must therefore react in such a way that changes in light are not perceived as disruptive jumps.
Wrong position of the sensor
A first pitfall is the position of the sensor. If a sensor hangs in the wrong place, it does not measure the light situation relevant to the room or work surface. For example, it may see too much direct daylight, or, on the contrary, be overly influenced by the artificial light from the luminaires. In both cases, this creates a control that does not properly reflect what users experience in the room. For this very reason, it must be determined at the design stage which zone the sensor should actually represent.
Overly coarse control zones
A second pitfall is working with control zones that are too coarse. In rooms with a distinct façade side and a deeper interior area, it rarely makes sense to control everything as one zone. The amount of daylight simply varies too much for that. If one sensor or one control has to control too large an area, you often end up with a compromise that doesn’t work really well anywhere. Workplaces near the window receive too much artificial light, while places further from the façade receive too little or vice versa. A good lighting plan therefore takes into account the relationship between the work area, immediate surroundings and the rest of the room.
Too aggressive dimming response
Finally, we often see an overly aggressive dimming response. When luminaires react too quickly or too visibly to changing daylight, the control becomes disruptive rather than supportive. Especially in offices and educational environments, this is quickly noticeable. Therefore, settings such as sensitivity, tolerance and threshold values are not only technical details but also design parameters. They help determine whether a room feels calm or, on the contrary, becomes unnecessarily dynamic.
Daylight control, lux and standardization
Daylight control is not separate from the rest of a lighting design. The subject touches directly on Lux, UGR, a good lighting plan and the requirements of the standard. After all, it is not just a question of whether lighting dims automatically, but above all whether the room remains functional and pleasant to use. A control system can work well technically, but still fall short if the light level, uniformity or visual comfort are not up to standard.
EN 12464-1 describes the lighting of indoor workplaces, looking emphatically beyond just “enough light.” The standard links requirements to the work area itself, to the immediate surroundings around it and to the rest of the room. In addition, uniformity, luminance ratios and glare also play a role. This makes the standard particularly relevant in daylight control, because changing daylight affects how stable and comfortable a room is perceived.
For installers and lighting designers, this means that daylight control must always be considered in conjunction with the room. A set lux value is only really useful if it suits the visual task on the work surface. At the same time, you want to avoid differences in brightness becoming too great or luminaires and windows together creating too much visual unrest. The standard therefore looks not only at lighting levels, but also at uniformity and, where relevant, the UGR value for glare.
In practice, this means that daylight control is not a separate technical trick, but part of a broader design issue. Anyone who wants to control a room properly must therefore think not only about sensors and control, but also about luminaire selection, light distribution, window orientation and use of the room. Especially in office lighting and healthcare lighting , for example, this comes together. There, lighting must not only respond efficiently to daylight, but must also be right in use and experience.
When is daylight control a logical choice?
Daylight control is an especially logical choice in rooms where the amount of natural light changes noticeably throughout the day. The system adds most when there is a clear difference between times or zones with lots of daylight and times or zones with less daylight. In such situations, daylight control helps to better match artificial light to what the room needs at that moment.
Not every project needs such control. In a space without significant daylight, such as an internal traffic area or an enclosed area without windows, there is little to control. Then daylight control usually adds little to the design. Presence detection or a simple dimming solution is often more obvious there.
In a façade area, a classroom or an office with large glass windows, on the other hand, it often makes sense to include daylight control. There, the light situation changes continuously due to the position of the sun, clouds and seasons. Without control, lighting in such spaces can easily remain on higher than necessary. A properly adjusted control system not only enables energy-conscious use but also ensures a more pleasant and consistent lighting scene.
So the added value is mainly in projects where daylight is really part of the room experience and use. This is precisely where it pays to start thinking about sensor position, control zones and the desired light level at the work surface as early as the design phase. In this way, daylight control does not become a separate addition afterwards, but a logical part of the overall lighting design.
Requesting advice
Are you unsure if daylight control is a logical choice in your project? If so, it makes sense to look into it early in the design process. After all, the right solution depends on the space, daylighting, layout and the desired level of light on the work surface.
Want to spar about the best approach for an office, school or healthcare environment? Then feel free to contact us for advice. If you are already working on a concrete project and want to incorporate the lighting well into the design right away, you can also request a lighting plan.